Monday, September 18, 2023

Code to make financial dimension element mandatory in D365 x++


   [PreHandlerFor(tableStr(CustTable), tableMethodStr(CustTable, validateWrite))]

   public static void CustTable_Pre_validateWrite(XppPrePostArgs args)

   {

       DimensionAttribute                  dimAttr;

       DimensionAttributeValue             dimAttrValue;

       DimensionAttributeValueSetItem      dimAttrValueSetItem;

       CustTable                           custTable;

       RefRecId                            defaultDimension;

       boolean                             ret;


       custTable   = args.getThis();

       ret         = args.getReturnValue();


       defaultDimension    =   custTable.DefaultDimension;


       dimAttr             =   DimensionAttribute::findByName('Department');

       select firstonly RecId, DisplayValue from dimAttrValueSetItem

               where dimAttrValueSetItem.DimensionAttributeValueSet == defaultDimension

           join dimAttrValue

               where dimAttrValue.RecId == dimAttrValueSetItem.DimensionAttributeValue &&

               dimAttrValue.DimensionAttribute == dimAttr.RecId       &&

               dimAttrValue.IsDeleted == false;


       if (!dimAttrValueSetItem.DisplayValue)

       {

           ret     = checkFailed("Department must be specified.");

       }

       args.setReturnValue(ret);

   }


Wednesday, September 13, 2023

Code to export the data to Excel format in D365f&o


using System.IO;

using OfficeOpenXml;

using OfficeOpenXml.Style;

using OfficeOpenXml.Table;

internal final class RunnableClass1

{

   public static void main(Args _args)

   {

       HcmWorker hcmWorker;

       MemoryStream memoryStream = new MemoryStream();

       using (var package = new ExcelPackage(memoryStream))

       {

           var currentRow = 1;

           Filename fileName = "Test.Xlsx";

           var worksheets = package.get_Workbook().get_Worksheets();

           var CustTableWorksheet = worksheets.Add("Export");

           var cells = CustTableWorksheet.get_Cells();

           OfficeOpenXml.ExcelRange cell = cells.get_Item(currentRow, 1);

           System.String value = "Personnel Number";

           cell.set_Value(value);

           cell = null;

           value = "Name";

           cell = cells.get_Item(currentRow, 2);

           cell.set_Value(value);

           while select hcmWorker

           {

               currentRow ++;

               cell = null;

               cell = cells.get_Item(currentRow, 1);

               cell.set_Value(hcmworker.PersonnelNumber);

               cell = null;

               cell = cells.get_Item(currentRow, 2);

               cell.set_Value(hcmworker.Name());

           }

           package.Save();

           file::SendFileToUser(memoryStream, fileName);

       }

   }

}

Output :


Tuesday, September 12, 2023

Invoice a sales order using X++


Code :

SalesFormLetter salesFormLetter;

       SalesTable        salesTable;

       salesTable=SalesTable::find("000810");

       salesFormLetter=SalesFormLetter::construct(DocumentStatus::Invoice);

       salesFormLetter.update(salesTable);

       info(strFmt("%1 Sales Order Posted and Final Status is Invoiced",salesTable.SalesId));


IF you are getting "Posting An error occurred during update" error then :

Inventory Management > Setup > Inventory > Item Model Groups > FIFO 

Select the checkbox Physical negative inventory.


Wednesday, September 6, 2023

How to get Default dimension format in D365

 General Ledger > Chart Of Accounts > Dimensions >Financial dimension configuration for integrating applications


The value in format control is updating in table. And the control in unbounded.


Tuesday, September 5, 2023

How to create a Custom ER in D365

 My requirement is to develop a custom ER. Here I'm exporting all vendors to Excel Format.

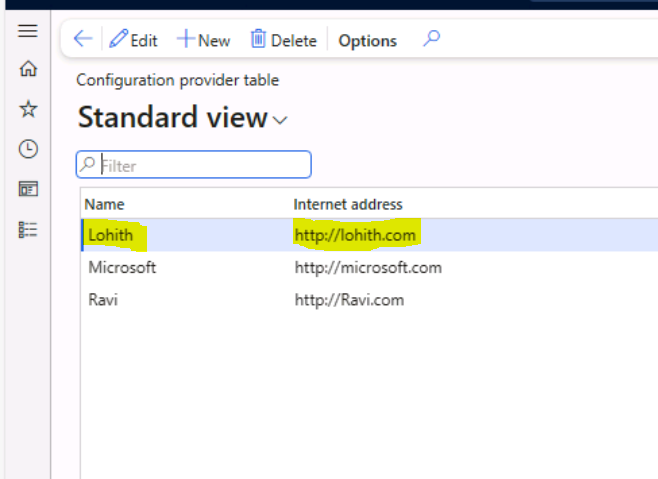
Step 1 : Create a new configuration provider

Electronic Reporting > Configuration provider > new


Set the provider to Active state.


Click on Electronic Reporting. Then create a Configuration Root.


A new Root is Created. Click on Designer on the Action Pane to create a Data Model.


Click on the new button to create a root reference.


Click on new button to create a Active Node to root. 
Note : Keep the Item Type Property to Record List because , this property is for generating to multiple lines.


Create the fields based on your requirement. 
Note : Field datatype should match with the datatype of table field.
If not, its will not bind with the Table field.

After the Model is created. Change the status from draft to complete.


Model Mapping :

Now this step is to map the created fields with the table fields.


Click on designer.


A record will be created with the Model. Click on the designer


Select the Table Records >Add root > table >Ok


Bind the table fields or methods with the Model fields to get the data.


Change the Status to Complete.


Create an Excel sheet for report design. 

In Excel go to formulas > Name Manager > create a new Element .(For multiple Lines)
IF not Single record will be exported.


Step 3 : Create a Format for import of Excel.


Click on Designer


Click on Import. Add the File


Bind the Cells with the Model Fields.


Change the status to complete  and run the format. An Excel file will be downloaded.


Output :


If you want any input parameter or to apply any filter :

Note : You need to know the EDT of parameter which you want to add.
Eg: I want to filter Vendors based on selected vendgroup.

Vendgroup EDT is VendGroupID


Add a Calculated field in order to map the model with the parameter value.

Click on Calculated Field >Add root>Edit formula


Bind the Model with the Calculated field root.


Run the Report.


Output :